Wednesday, August 5, 2015

Beach Camping

We drove up the east coast of Florida, north
 of Daytona to enjoy a little beach camping. 
It's only our second try at this. We have a 
Roadtrek van/class B rv that we love to use
 for more comfortable road trips
(especially when we had the doggies)
but have never really planned to camp. 
Well we gave it a try.
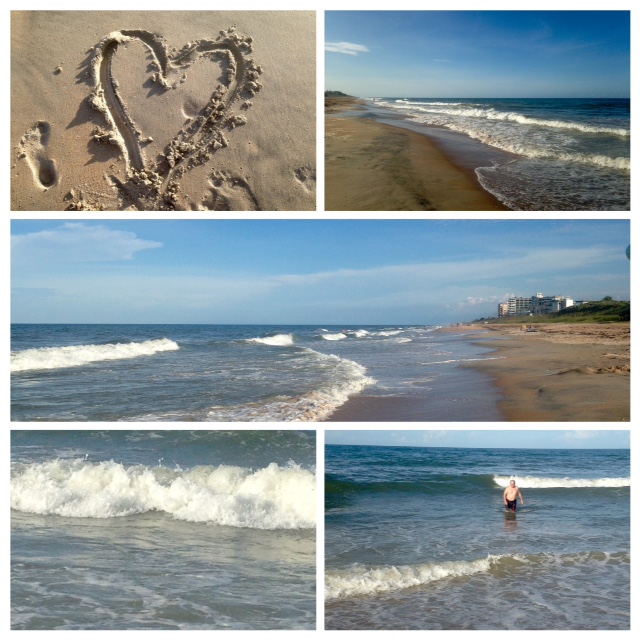
 This alone is worth it!  To be able to walk
 the beach each evening after dinner. It
 was a short mini-vacay. Three days at
the beach was just enough.
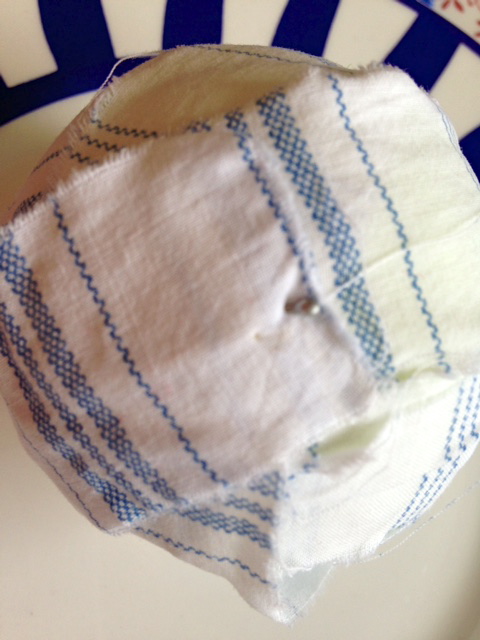
 Daytime walks always include picking up
 shells. I gathered these for our picnic 
table centerpiece. Gotta have a centerpiece!
Larry knows by now that any nature walk
 with me requires a bag. I'm either picking up
 pinecones or sea shells, occasionally 
Fall leaves, and rocks too.
 Our only camp requirement was a spot on 
the beach with an ocean view. We can check 
availability for last minute trips because they
 are usually just a few hours drive away. We
 keep the van loaded with some essentials, 
so packing is just clothes, beach stuff, 
beach reads, food and beverages. 
 Ah the food! We come prepared!
I prepped all our meals ahead of time. 
Everything was put in Ziplock bags.

Pork chops were seasoned before freezing 
Burgers were seasoned before freezing
Green beans were also prepped. 
French toast oven casserole ingredients 
in a bag with the streusel topping
in a separate bag. 
Easy Oven Eggs mixture-in a bag. 

Three bean salad-Tupperware

Dinners
1. The pork chops were thawed and 
grilled , served with the green beans and
baked (microwaved) sweet potatoes.
2. Hamburgers were thawed and grilled,
served with 3 bean salad.

Breakfasts 
1. French toast casserole was put into a
 small greased baking pan, streusel sprinkled
 on top and baked in the toaster oven. 
2.  Easy Oven Eggs were baked the same 
way the next morning. 

Lunch was chicken sandwiches with
Swiss, lettuce, tomato, avocado on
Italian bread. The usual assortment
of condiments, chips, cookies, snacks
coffee, iced tea, soda, wine,  and 
margaritas. I think we have a secret 
fear of not having our favorite food 
available at all times! 
I even use real plates and utensils. It
takes only minutes to wash the few dishes.

I've been making lots of lists; food,
clothes, toiletries.  I also keep basic
 things in bins so they are ready to go.
I'm still tweaking my system.  

Cheers!


Links: Between Naps On the Porch,
Facebook, 


Monday, August 3, 2015

No-Sew Denim Apron

This is the easiest apron you'll ever make!

Just cut-up a pair of old jeans and you'll have
the perfect apron for gardening, crafting and
cooking. Big front pockets too!


 This works best with a pair of jeans that are
big for you. Men's jeans are perfect.
 Cut off the legs at the crotch. 
 Cut along the side seam. 
 Cut under the waistband.
 This completely removes the front of the
 jeans leaving the waistband to use as 
the...well... waistband of the apron. 
 Now you have the two back pockets of the 
jeans in the front of your apron. Neat right!
 Repurposing old jeans into a craft apron, 
garden apron, and all-around work apron 
is an all-around great idea. 
Go rescue those jeans!
Cheers!

Monday, July 27, 2015

Sofa Table Got The Blues

Pulling a few things together from around the
house to perk up the sofa table for the
 rest of the summer.
I had every intention of staying with the red, 
white, and blue Americana theme, but then I
 changed the coffee table. That lead to 
changing the breakfast table and you know 
how that story ends. Actually, I don't think 
it ever ends, but here I go making a few
 changes...puttering, tweaking, and rearranging.
 Dishes and tea cups and tea pots
are my reliable go-to items.
I brought in this shabby birdhouse from 
the patio. I added a row of my vintage
 German spice jars.
I used my favorite table runner...picket fence. 
I think I may have added a few things since 
the picture was taken a few days ago.
Be right back!
This sofa table vignette needed a plant.
I just cut some leaves and orange ixora from
the yard and put them in a tall blue and white
ceramic vase...ahem...the'vase'  was a
repurpose toilet brush holder. I wasn't
 using it in the guest bathroom anymore,
so it was scrubbed clean and now has a
new life. It's a real Cinderella story.
Cheers!


Links: Between Naps On The Porch,
Facebook, 

Thursday, July 23, 2015

Farmhouse Blue Table

Right after lunch I felt I needed a new
look, on the table, that is. It's the
 the easiest way to freshen things up
around here. Larry just rolls his eyes.
I explained that you wouldn't wear
 the same outfit every day for a week.
That example didn't seen to resonate
with him. I got started right after I cleared
the lunch dishes. I wanted a farmhouse-style
look this time so I scrambled a few things 
together. The breakfast table got it's new 
'outfit' and I got my need for a simple 
change in minutes. Feeling better already.
For the table runner I used 2 new 
 kitchen towels with a grain sack look.
My rustic horseshoe handled tray 
would work for the center.
I gathered a couple of plants, the pothos
and a still blooming orchid, and a few 
pieces of blue and white pottery.
All set. I can now go on with my day. 
Cheers!


Thursday, July 9, 2015

Rustic Wood Pallet Frame

This large sunflower painting was a birthday
 gift from my  mother. We were having my
birthday dinner in a favorite restaurant
and I was admiring it. I thought it would
 look perfect above the fireplace in
our condo in North Carolina. The colors
were just right. The owner noticed and 
said that he would sell it for $50. 
Didn't have time to think twice when
my mother said she'll take it. Birthday gift
shopping right there!  
It had an ugly chrome frame, but I knew we
could fix that. We removed the frame and
took just the painting with us on our next trip.
 I wanted a rustic frame. Free pallet wood 
found by the dumpster and leftover wall paint
 were all we needed. Miter cut the corners
 and attach, paint and done.
Free and easy! 
I filled an antique butter churn with
sunflowers to compliment the painting.
 A gift I'll always love and enjoy looking
at and remembering the story. It's a nice
 welcome and sweet memory when we are
   visiting the 'Cabbage'. It's what we call
our place in NC. Half Cabin - Half Cottage.
Cheers!
Links: Between Naps On The Porch, Share Your Style ,
It hangs above the fireplace in our Smoky Mountain Cabbage HERE.

Monday, July 6, 2015

MAY St.

I found this street sign many years ago at an
antiques flea market. The vendor said is was
 an old cast iron sign from San Francisco.
 This weekend I decided to hang it over the
archway from the kitchen/breakfast area
leading into the living room.
 I took down the chalkboard sign that was
previously there.
This is such a better place for it than where I
had it. Don't know why I hadn't thought
of hanging it here where we can see it.  
It was in my laundry room. On the back wall 
with the antique washboards. I spent a few 
days cleaning out the laundry room; all the 
cabinets, even the tops, and all the stuff up 
there, under the utility sink, organized all the 
cleaning supplies, reorganized the shelves
 on this make-shift bookcase made out of 
old bifold doors. That's when I remembered a
 friend suggesting that that sign really needed
 to be somewhere where it can be seen. 
"Too cool to hide" were her words. 
So here's it's new happy home. 
I'm liking it in here. 
Welcome N MAY ST

Cheers!

Friday, July 3, 2015

Fabric Repurposed Tennis Balls

I've been wanting to find a craft that uses
my old dead tennis balls and here it is!
This is a no-cost project. Love that!
 It repurposes things I have plenty of. 
Love that! It takes no time
 and no skill. Love that too!
 Here's my stash of repurposed fabric, 
you know, old shirts, sheets, etc. 
Everything gets dumped in here. 
In the entry way of all places, but it's
 in a basket, so nobody knows and it's handy
 for "lightbulb moment" days.
I pulled out the red, white, and blue pieces.
 Have lots of used tennis balls. I you don't
play tennis, ask a friend that does, or call
your local club. Save the empty cans too.
I use them to store everything!!
 Cut/tear your fabric into about 1" strips and 
cover the balls tightly, overlapping new
 strips as needed. 
 I used pins. I save (doesn't everybody?) 
those tiny head pins that come with new
 stuff. Those are better, if you have them.
  Now just pin down the last strip
through the fabric (not the ball)
It will hold just fine. Pile the
finished balls in a bowl, pin side down. 
Viola! 

I've also covered tennis balls with rope
as seen in this post.
Here's my family room coffee table vignette.
Think of all the other colors you can use
 for every holiday or your decor. You can
 even store them back in the tennis can 
when you pack-up. 
In addition to the tennis ball craft, you 
may notice my fun avatar. You can create 
your own using the app Bitstrips. Then
 you can use it to annoy your family when 
you text them along with pictures. My
 daughter Kim and I have been texting 
each other and having so much fun! 
My granddaughter is begging
us to stop :))

Have A Star Spangled Weekend!!
Cheers!
Links: Between Naps On The Porch,
Facebook, Common Ground, Home Sweet Home,
The Girl Creative, Somewhat Simple,